
For a number of reasons, many modern cars sadly are not equipped with a factory spare wheel and tire. Blame it on weight-saving measures, lack of rear storage space, or plain old cost-cutting, but the fact remains that you're on your own when a tire goes flat.

Even if you were gifted with a manufacturer spare tire, it's most likely a space-saver spare that requires several minutes of inflation with an electric-powered tire pump. When you consider the total time it can take to unhook and remove a typical compact spare from its cozy nesting place, inflate it, jack up the vehicle, and swap on the spare wheel, you're dealing with a significant amount of time spent.

Not a good thing when you're on the side of the road where risk of injury from being hit by other vehicles is high. If you can see the source of the leak, such as a nail or screw visibly in the tread, there's a good chance plugging a tire on the spot yourself will take less time than putting on a spare tire - even if you're not practiced at it.
For the purposes of this article, we'll focus on how to plug a tire because the process is straightforward with only a few steps, and because it does not require the tire to be dismounted from the wheel. In fact, it's often possible to plug a tire without even taking the wheel off the vehicle. We'll also discuss how to apply a tire patch - a more complex process that can only be done on the inside of the tire.
Equip Yourself With A Compact Tire Air Compressor Pump + Tire Pressure Gauges

First, however, we recommend equipping your vehicle with a portable electric tire air compressor pump that comes complete with a car charger cord. Not only is it handy to have at your fingertips all year round, but you'll need it to complete the tire repair process. After all, fixing a tire isn't much good if you can't reinflate it to drive on. Since easy-to-read psi gauges are integrated into the compressor pumps we sell, you'll be able to check pressure in your other tires also.

If your leaky tire is still intact enough to hold air temporarily, portable tire compressor pumps let you quickly re-inflate it long enough to drive to a safer spot out of harm's way. You shouldn't be without one, and we've got a selection of tire pumps that are inexpensive and compact enough to stow virtually anywhere. We also recommend having a few extra tire pressure gauges around as well.

Determining When You Cannot Repair A Tire
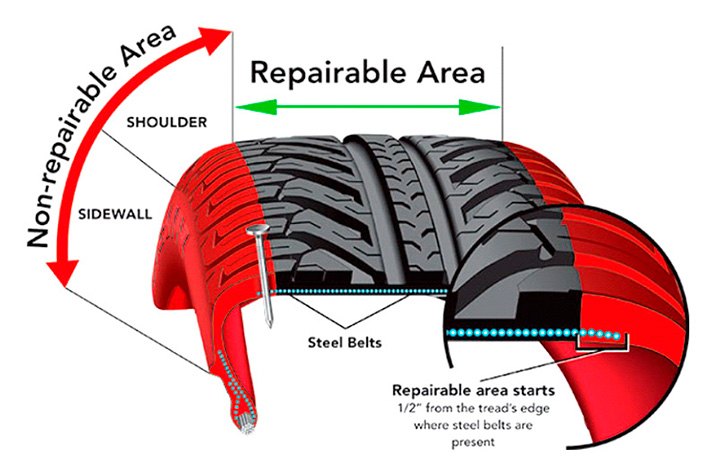
It's important to point out that there are times when a tire cannot and should not be plugged or patched. If the puncture is on or near the sidewall, plugs will not hold because those areas flex too much. If tire damage is more of a cut or jagged tear, plugging will not be effective either. Run-flat tires cannot be plugged or patched because the rubber they're made from is too hard and stiff. Also, Z-rated tires designed to maintain a speed of 150+ miles per hour should never be plugged or patched - only replaced.
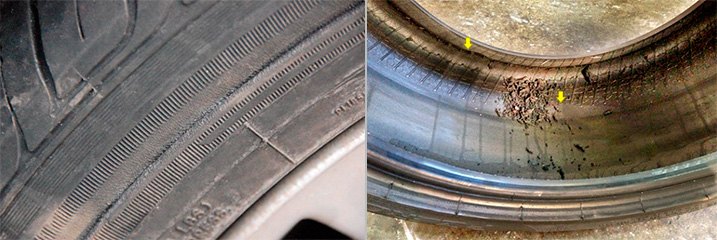
Tire patches are another type of tire repair, and can be performed in some cases when a plug can't be used. See section 4 of this article for more details. Note that if a tire has been driven on with little or no air pressure for more than a mile or so, the sidewall loses strength to the point where the tire is permanently damaged and must be discarded.
How To Plug A Tire
A tire plug is a long strip of soft, malleable rubber designed to be inserted into a puncture from outside of the tire. Once it's inserted, it expands to fill the hole and block any air from escaping. Tire plugs are most effective on small punctures created by nails, screws or other sharp objects.
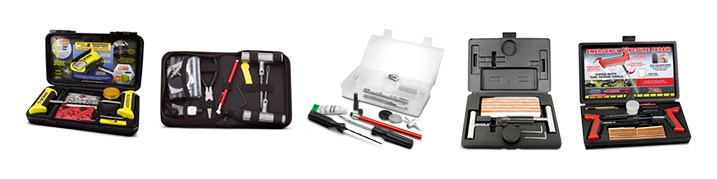
Once you're done reading the steps below on plugging a tire, consider taking a look at a few of the tire repair kits we offer. Typically, they'll include a T-handled reamer tool, multiple soft rubber insert strips, a T-handled strip insertion tool - along with other useful tools such as a hex wrench, screwdriver with reversible shaft, valve core tool, razor blade, and special plug strip adhesive lubricant.
Find The Leak
The first thing you'll want to do is find the air leak. If there's no visible nail or screw and there's still pressure in the tire, you may need to take the wheel off the vehicle (see our related article Lift Your Car Easily And Safely With A Quality Floor Jack) to locate the puncture.

To find where air is escaping, you'll want to put soapy water across all surfaces of the tread until you see it disturbed by small bubbles of air. Ideally, a spray bottle with 80% water and 20% soap works best, but in a pinch use whatever liquid you can come by. We recommend carrying extra windshield wiper fluid in your vehicle, because that also bubbles up well when poured on a leaky tire.

If you're fortunate enough to be at home dealing with the flat tire, a test tank allows you the luxury of submerging whole sections of the tire until you see air bubbles in the water. We've got them in sizes that can accommodate standard passenger car tires all the way up to larger sizes for trucks. Professional shops use them because of how easy they make the leak-finding process.
Mark Where The Hole Is

Once you find the source of the leak, you'll want to mark it right away. In all seriousness, it's very easy to turn your attention elsewhere for a moment only to realize you cannot remember or find the location of the hole. For no-nonsense marking on dirty, wet tire surfaces that's easy to see and not permanent, we recommend a special tire marker crayon/pen. Often, you'll see tire markers included in tire repair kits
Prepare The Puncture For a Tire Plug Strip
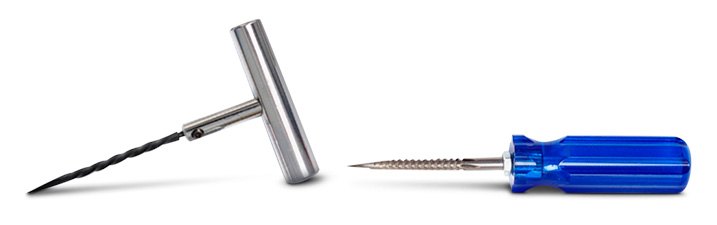
Preparing the puncture means using a T-handled reamer tool to enlarge the puncture hole while making it even, straight, and large enough for the tire plugging hook and strip to be inserted in the next step. With a hand firmly on the reamer tool, use it as you would use an awl to create a hole in a wall or stud. The more air that's in the tire, the easier it will be. A tire with little to no air will deform as you attempt to ream it.
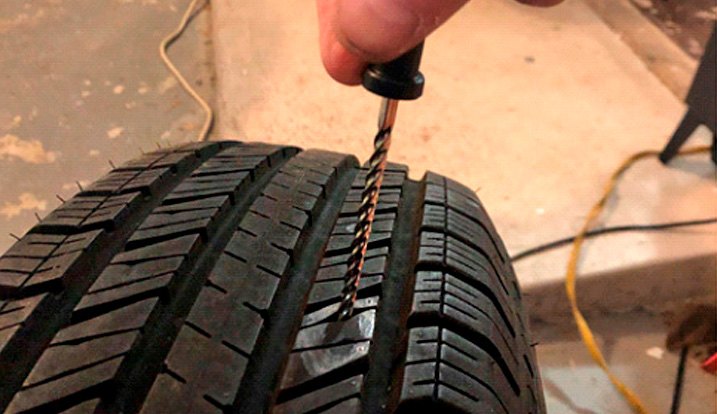
If the tire is low, use your compressor to fill it up to a greater than normal pressure since some air will leak out before reaming. Don't worry if it seems like you're causing further damage to the tire, reaming is an important and necessary step. When you're done, leave the reamer tool in the tire temporarily to keep air from leaking out again.
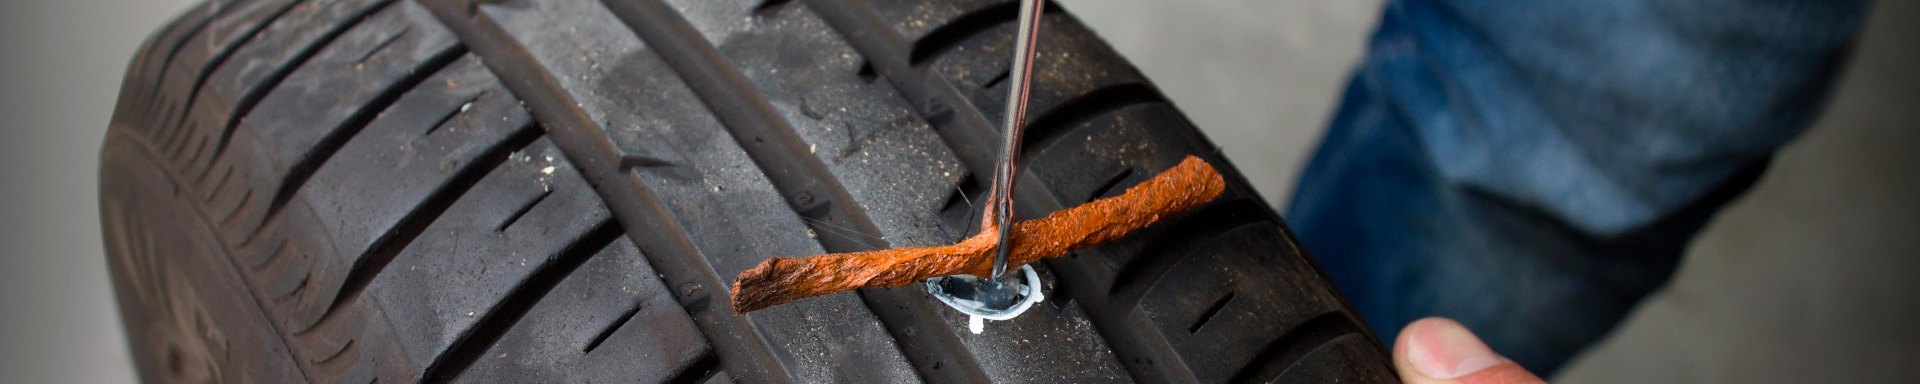
Insert The Tire Plug Strip
Next, thread the tire plug insert strip through the eye at the bottom of the T-handled insertion tool shaft. Before inserting it into the tire, coat the strip with rubber cement. If you don't have any rubber cement with you, the tire plug piece will still work without it.

Once you've got the plug strip positioned in the needle and ready to go, remove the reamer tool from the tire and immediately push your T-handle plug insertion tool into the hole - working it all the way down until about half an inch remains, then slowly pull it back out. As you pull it up, the slotted eyelet on the end of the insertion tool will allow the strip to slide free and stay in the tire, nicely filling the hole.
When it comes to individual T-handles , we recommend The Main Resource 3" T-Handle Open-Eye Insertion Needle, Amflo Super Grip Eye Repair Needle, and BlackJack 4" Sport Handle Open-Eye Insert Needle.
Clean Up And Re-Check The Original Leak

Clip off the excess parts of the strip sticking out of the tire, then apply more soapy water or wiper fluid to confirm that the plug is effectively stopping the air leak. If you don't see any bubbles this time, the repair is good. Odds are low you'll still have a leak, but if so you can yank the plug out and try another one. If two tries don't fix the leak, the puncture may be too jagged or too large, in which case you'll want to consider applying a patch to the inside of the tire (requires dismounting from the rim) or replacing it altogether with a new tire.
Tire Patches
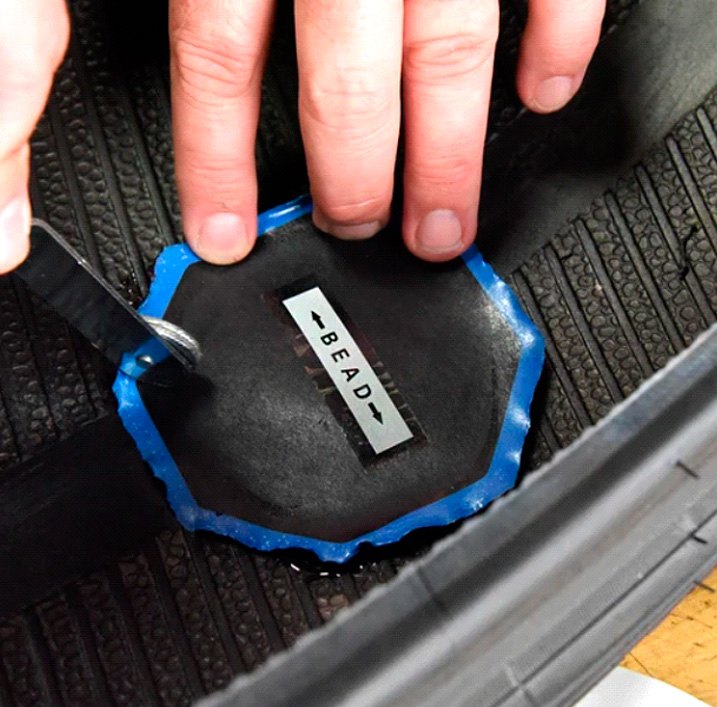
The most important thing to know about tire patches is that they are applied to the inside of the tire, which first requires it to be dismounted from the rim. After patching is complete, the tire must be remounted and balanced again. Patches are stronger than plugs and can be effective when a tire has a clean cut along the tread area, or a slightly larger hole that's too big for a standard tire plug. We're including this section mostly for educational purposes, since we understand not everyone has access to tire mounting and balancing machines.
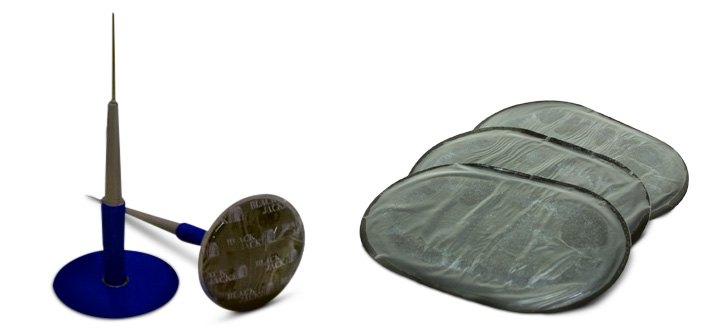
The patch itself is basically a large bandage made of rubber with an adhesive backside that's stuck to the inside of the tread area. Patches designed for circular punctures include a lengthy plug appendage that goes through the hole similar to the way a tire plug does. We'll refer to these as "patch-plugs". Standard patches designed to repair cuts or damage across a wider area have no plugs attached and tend to be a little larger.
Note that patches will not seal run-flat tires or sidewall areas effectively. Unlike plugs, patches require a few preparation steps.
If you're using a patch-plug to fix a round puncture, it's important to ream the damaged area into a clean, even hole. Use a T-handle reamer tool, or even a drill. If you're dealing with a cut on the tread area, you'll be scraping away any unevenness on the inside of the tire with a tire scraper (see two steps down). Mark off the area where the patch will be applied.
Next, pour some pre-buff rubber cleaner on the section you'll be patching. Once you've cleaned the area, use a tire scraper to scrape off the top layer of dirt and natural oils from the original tire manufacturing process that may be left over.
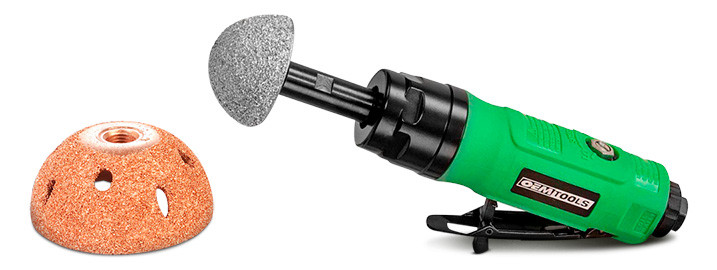
Next, use your choice of tire buffer drill bit attachment or buffing tool such as the OEM Tools Air Tire Buffer to buff down the top layer of rubber and create a smooth surface without exposing any of the underlying steel cords. Apply some additional cleaner as you wipe the surface free of all rubber shreds from buffing. Then, smear on a thin layer of Rema Tip Top Ultra Fast Dry Vulcanizing Cement where the patch will be placed.
Once the vulcanizing cement has dried, it's time to put the patch on. Use a narrow roller tool such as the 31 Incorporated 3/16" x 1-1/2" Wood Handle Stitcher (far right) back and forth to apply pressure across all areas of the patch. If you're using a patch-plug, the plug section needs to be inserted and then pulled firmly from the outside to seat the patch flush on the inside of the tire.
Finally, apply some inner liner rubber sealant such as the Permatex Black Rubber Sealant to finish things up, letting everything cure as directed by the manufacturer's instructions on the label. Once complete, the tire will need to be mounted back on the wheel and rebalanced.

We hope this article has been educational, and that it's helped you to realize not only how easy it really is to plug a tire, but that you can do it yourself for very little cost. We welcome questions you may have on any of the products referenced here on CARiD, and our knowledgeable product reps are here seven days a week to help.